
Use the region name and named room on your map together. Paris Streets, Holy Innocents’ Cemetery and the Catacombs form the opening journey; the castle adds Main Hall, Library, Clock Tower and later routes. For the next story objective, use the progression walkthrough. For a return trip, choose a Ferryman’s Wharf or Mirror of Life.
World overview: Paris and the castle
The screenshot below is an early Ferryman destination screen. It locates Paris Streets, Holy Innocents’ Cemetery and Catacombs of Paris together. It is a snapshot of available destinations at that point, not a finished world map or a promise that every area is already open.
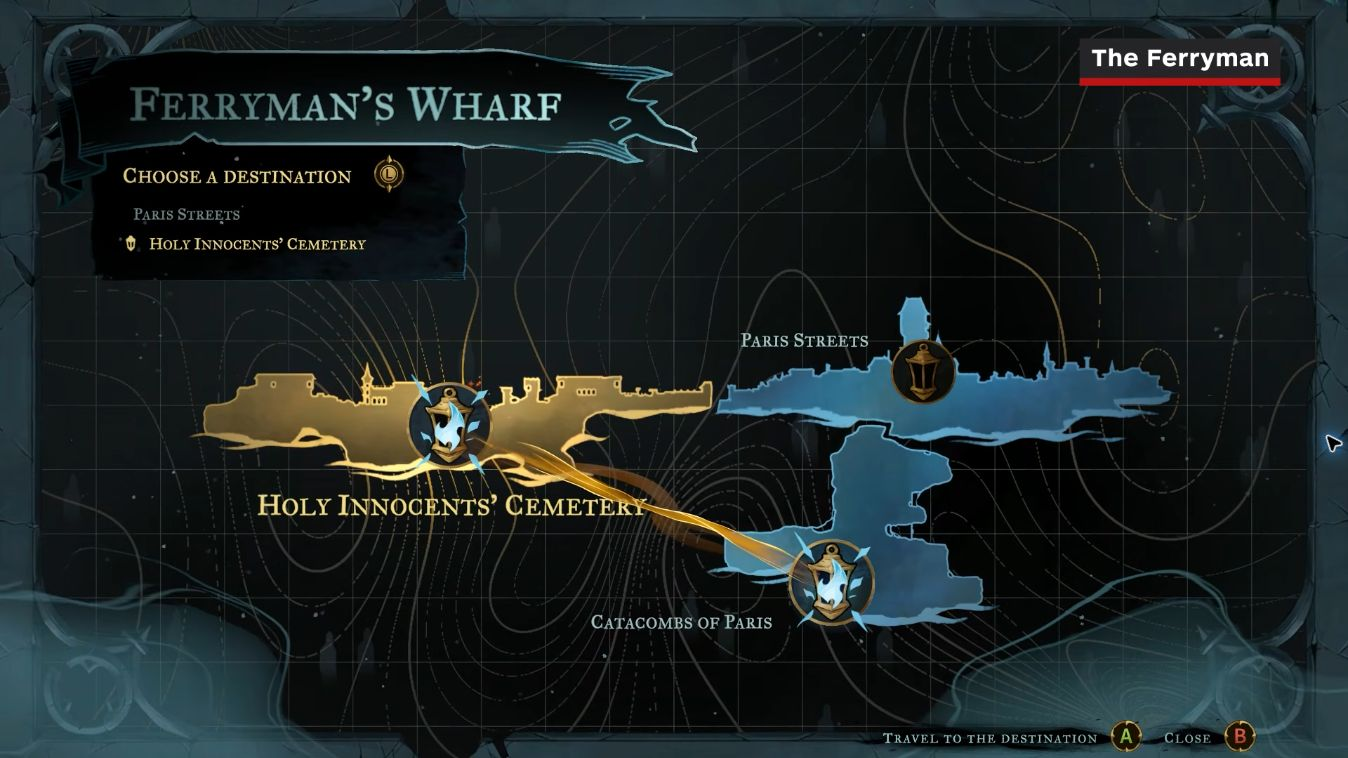
This early destination screen places the three opening regions together and shows the lantern-shaped wharf symbols. It is an unlocked-destination snapshot, not the full late-game map.
Gameplay capture: IGN · 0:48 in the original video ↗ · Game © KONAMI / Evil Empire. Not our own recorded playthrough.Regions and connections to check
| Region / area | How it fits into exploration | A useful next check |
|---|---|---|
| Paris Streets | Opening streets, sewers and Prison Tower routes. | The Fallen and Joan belong to this opening progression; check your missing guardian key before heading underground. |
| Holy Innocents’ Cemetery | The cemetery branch explored before the Catacombs in the linked completed route. | Medusa supplies another guardian key. Eleanor’s later cemetery destination belongs to the Sage route. |
| Catacombs of Paris | The descent after the guardian-key gate; it also contains the first Death encounter and the route to the Ferryman. | An early scripted loss to Death is distinct from the later Notre-Dame fight. |
| Main Hall | Castle exploration and return routes, with branches toward Library and Clock Tower. | Compare named rooms before taking a branch; Main Hall secrets covers selected hidden passages. |
| Library | The Planetarium and Observatory belong to the Carmilla / The Occultist route. | Check the globe puzzles and the Aerial Rush checkpoint. |
| Clock Tower | Talos / The Builder and the later Isaac route are separate progression checks. | The Eastern Access Shaft mechanism precedes Smash. |
| Notre-Dame | Reached through the Gallery of Eternal Night painting after its prerequisites. | The organ route leads toward Death and Double Jump; the virtue trials are a separate ending branch. |
| Hall of Mirrors | Mirror travel connects discovered save rooms; the sealed Eleanor maze is a later branch. | Use the focused maze guide for its shrine and staircase landmarks. |
| Master’s Quarters | The final-boss destination in the completed route. | Read the ending requirements before committing to the final sequence. |
This is an area index. Rows do not assert that each region connects directly to the next, or that every optional room is covered. The recorded route table supplies chapter links for the longer journeys.
Read a room map without confusing travel icons
- Read the region heading, then the room label. A room such as Old Gallery is a landmark within Main Hall, not another world region.
- Match the room’s outline, exits and the player indicator before following a direction. A wharf selection screen shows regional destinations; it is not a room-by-room walking route.
- Recognize a Mirror of Life by the save mirror in the actual room. For mirror travel, use its crouching interaction after the story unlock; an ordinary save interaction is different.
- A blue-lit doorway leads into a Ferryman’s Wharf. The wharf’s destination menu confirms which regional journeys are available in your save.
- Place a map marker on a blocked branch and remember the room name and obstacle. Remove it after you return and confirm that passage is open.
The region view and room labels are useful even when your map is only partly explored. Do not infer a universal icon legend from a color alone: a gold highlight on the destination menu is a selected destination, not evidence that every gold tile is a locked room.
The early regional destination screen appears at 0:48; the following mirror chapter explains how save rooms connect. This is a navigation example, not a complete interactive world map.
IGN · How to Fast Travel · Player loads when you choose Play.Watch on YouTube ↗Match the obstacle to the ability
| Visible obstacle | Check this unlock or mechanism | Follow-up |
|---|---|---|
| Whip anchors over a gap | Arcane Whip, obtained after The Fallen. | Compare the anchor and grapple prompt; added jump height is not a substitute for the anchor interaction. |
| Chaos Shards | Holy Light, obtained along the post-Joan route. | Use the light interaction rather than treating every breakable-looking object as a Smash target. |
| Golden-cracked floor | Smash after The Builder’s route and its tutorial. | Jump, then use Down + Jump in the air. The earlier shaft puzzle uses a mechanism before this unlock. |
| A tight airborne opening | Aerial Rush after The Occultist’s Library route. | Check the tutorial and your available air movement; see ability checkpoints. |
| A ledge above one jump | Double Jump after the later Death encounter and tutorial. | Press Jump again in mid-air, then judge any remaining horizontal gap. |
| A gate or wall with a mechanism | Its switch, lever or accessible side. | Search the connected room rather than assuming a new movement ability opens every gate. |
Choose a focused regional route
For Hall of Mirrors, compare the shrine, The Descent Into Memory and Belmont Manor route. If Eleanor’s entrance is still chained, use Sage’s Seals first. For a missed passage in Main Hall, compare the painting and Abandoned Workshop checks.
For a searchable external reference, the Belmont’s Curse Atlas world map ↗ supplies region and object filters. Match its room names to your game and keep its spoiler setting in mind. The external atlas is a separate site; its artwork and completion totals are not reproduced here.
When the map looks complete but progress is missing
- Separate map exploration, a collected item and an Arcana task. They are different checks; a filled room shape does not prove all its items or secret-zone conditions are complete.
- Read the exact objective under Works of Mercy. Check the card and its counter in the game before interpreting an outside checklist.
- Revisit marked edges with the relevant ability. Inspect tall shafts, mechanisms and breakable surfaces separately instead of trying one action everywhere.
- Plan the return using the nearest discovered mirror within the region or a wharf for a regional crossing. If a destination is absent, use the travel troubleshooting checks.
Sources & verification
- IGN: fast travel gameplay ↗ — early regional destination screen, wharf and mirror travel
- BeardBear: completed normal-ending playthrough ↗ — region names and chapter sequence; the recording contains backtracking
- Chinccw: traversal abilities ↗ — visible movement tutorials and ability-gate comparison
- Belmont’s Curse Atlas ↗ — external searchable map reference; no map assets copied
Checked 19 October 2026 against the credited gameplay and reference guides. Screenshots are credited video captures, not our own playthrough. Default button labels may differ if controls are remapped.