
After the first Death encounter in the Catacombs of Paris, climb out through the Collapsed Path of Orpheus and reach the blue doorway to the Ferryman’s Wharf. The Ferryman handles regional trips. After the castle appears, you can also hold Down to crouch in front of a Mirror of Life, wait for transport, and use the available mirrors for travel within that region.
Reach the first Ferryman’s Wharf
- Obtain the guardian keys from The Fallen, Joan and Medusa and open the Catacombs route. If you are still before that gate, follow the opening progression.
- Descend through the Catacombs to the first Death encounter. Continue through the story after the scripted loss; this is not the later fight that leads to Double Jump.
- Climb the Collapsed Path of Orpheus. At the top, take the right-hand room and enter the glowing blue door.
- Speak with the Ferryman. Use the wharf’s interaction at the small pedestal to open the destination selection.
- Select an available region and confirm with the button shown on your screen. The recorded early menu offers Paris Streets and Holy Innocents’ Cemetery; controller labels can differ.
The return-journey menu is the useful confirmation that travel has unlocked. The separate Ferryman’s Obol quest awards an Arcana spell; finding that quest item is not the prerequisite for opening the story’s travel service.
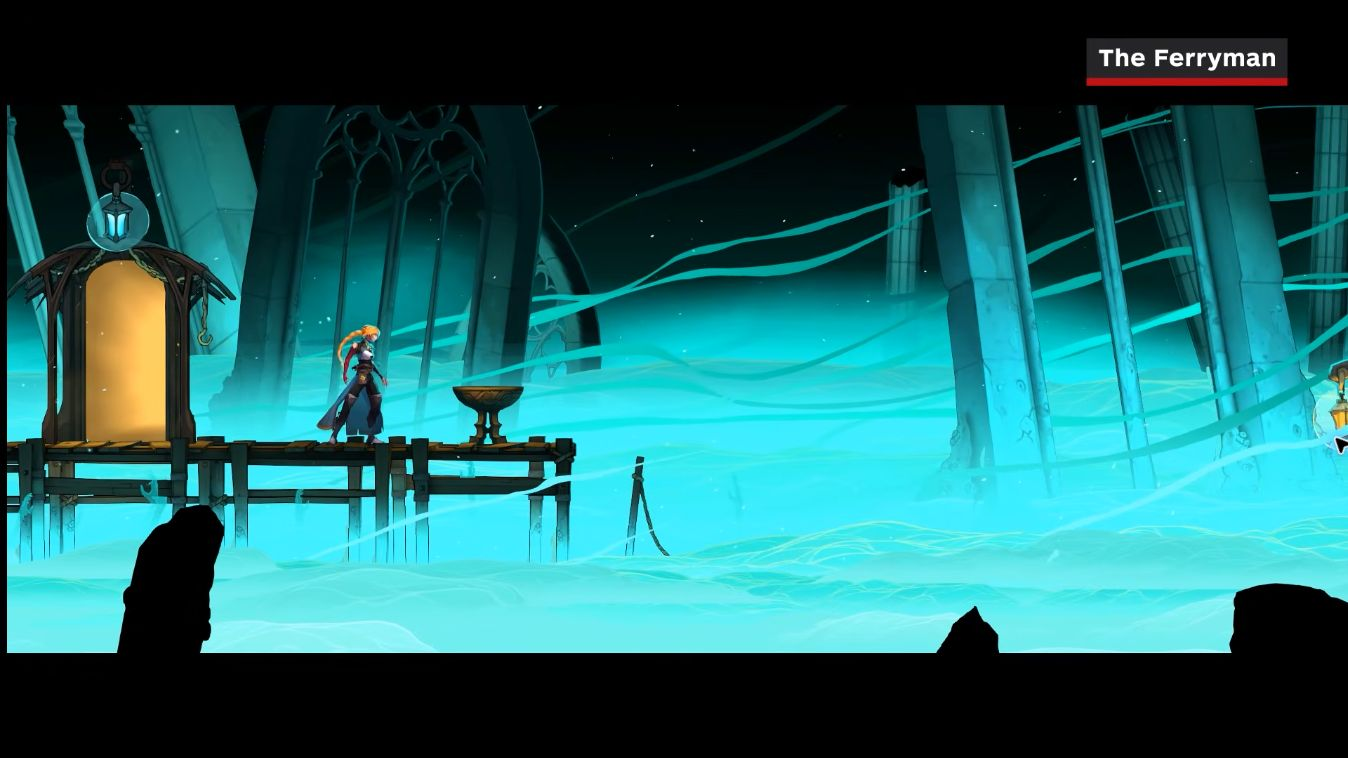
The blue lantern doorway, foggy pier and pedestal identify the wharf. The recording proceeds to the destination menu at 0:48. The IGN chapter overlay remains part of the credited source.
Gameplay capture: IGN · 0:43 in the original video ↗ · Game © KONAMI / Evil Empire. Not our own recorded playthrough.The Ferryman chapter begins at 0:26; mirror travel begins at 0:57. Compare the blue wharf doorway, destination menu and crouching action. Player loads only when you choose Play.
IGN · How to Fast Travel · Player loads when you choose Play.Watch on YouTube ↗Use wharfs for regional trips
Look for more blue-lit wharf doors as you enter new areas. Open and visit a wharf to check its available connections. You start these journeys from a wharf; the world map is not an anywhere-to-anywhere teleport button.
The first menu already includes the two opening surface destinations. Later regions require further exploration of their wharfs. If a region is missing, continue toward its entrance and travel point rather than searching every ordinary save room for a regional menu.
Choose the region closest to your target, then compare the named room on your local map. A trip to Main Hall does not place Rose in every hidden room within Main Hall.
Use Mirrors of Life within a region
- After the Catacombs story events and the castle’s appearance, stand directly in front of a Mirror of Life you have discovered.
- Hold Down to crouch and wait briefly. Stay in position until the transport animation begins. Saving at the mirror and crouching for transport are different actions.
- In the Hall of Mirrors, compare the mirrors and their destination descriptions. The floor corresponds to the region you came from.
- Choose an available mirror for a discovered save room and crouch before it to leave through that destination.
- Use a wharf when you need a regional crossing that the current mirror floor does not offer. Movement between the Hall’s regional floors is restricted early on.
Ordinary mirror travel is available before completing Eleanor’s full rescue route. The chained entrance, special seal mirrors and the maze are separate progression checks. The basic travel function does not require clearing every seal first.
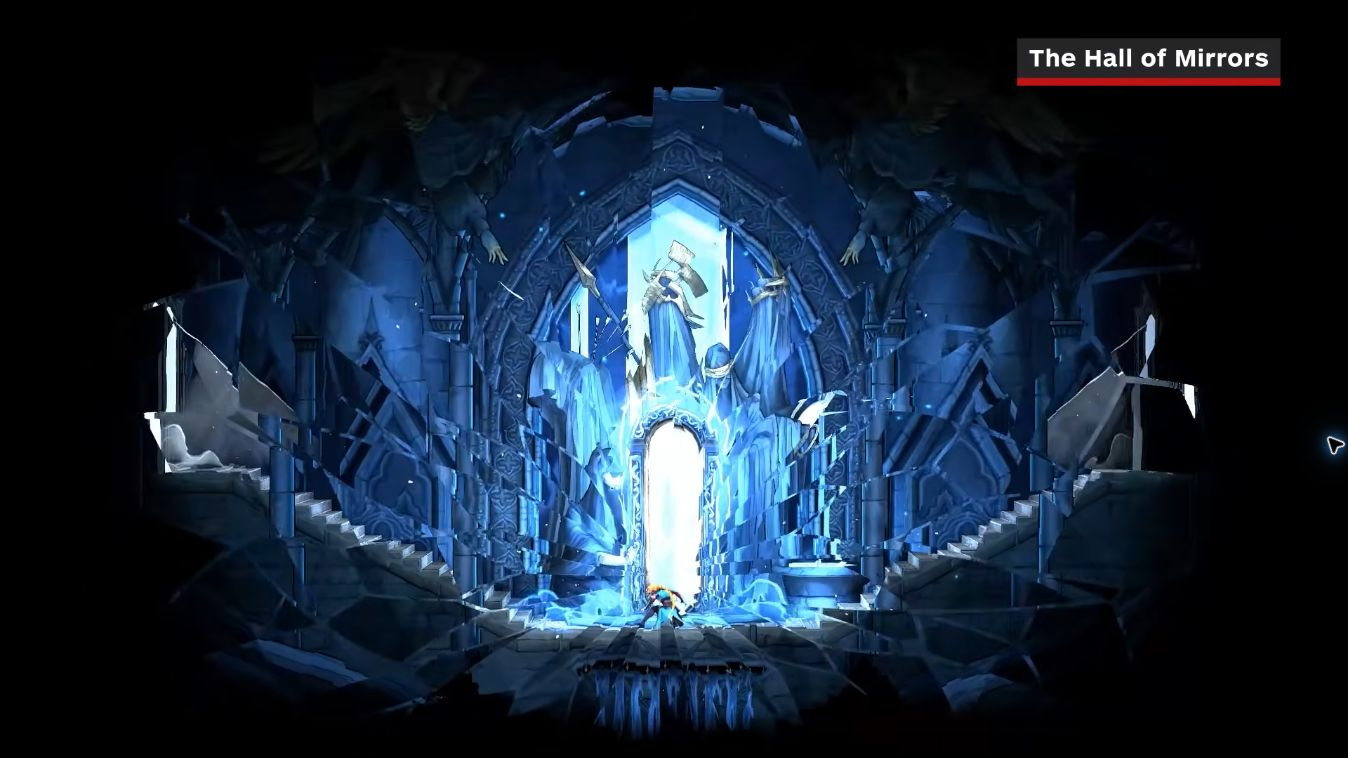
The mirror-travel chapter shows the crouching interaction and explains the regional-floor restriction. This frame is a Hall landmark, not evidence that every destination or floor is already unlocked.
Gameplay capture: IGN · 1:18 in the original video ↗ · Game © KONAMI / Evil Empire. Not our own recorded playthrough.Save, travel and seal challenges are different actions
| What you are using | Action / confirmation | Limit to remember |
|---|---|---|
| Mirror of Life save interaction | Use the normal save prompt; check the game’s save feedback. | A save alone does not select a travel destination. |
| Mirror travel | Hold Down in front of the mirror, enter the Hall, then crouch at an available destination mirror. | Discovered rooms on the available regional floor; early cross-floor movement is restricted. |
| Ferryman’s Wharf | Speak with the Ferryman and use the destination menu at the wharf. | Regional journeys begin from a wharf; later stops must be reached through exploration. |
| A special seal mirror | Enter its challenge, attack the overhead seal and finish the ambush. | This is a combat trial in the Sage’s Seals branch, not a missing ordinary warp. |
If travel or a destination is unavailable
Crouching does nothing at the mirror.
Check that you are past the first Catacombs Death encounter and castle appearance. Stand directly at a discovered Mirror of Life, hold Down and wait rather than tapping the direction or using only Save. Confirm the bound movement control if you remapped inputs.
I can enter the Hall but cannot reach another region.
The early mirror network keeps you on the current regional floor. Return through an available mirror, then use a Ferryman’s Wharf for the regional trip. Do not interpret the floor restriction as proof your save is broken.
My desired wharf is missing from the menu.
The opening menu supplies the early surface destinations, while further stops need exploration. Check that you have entered the destination region’s blue wharf door. An outside map pin does not confirm that this save has visited it.
A marked mirror leads to combat rather than a save room.
That is a seal challenge. Check its overhead seal and ambush completion on the seal guide. The separate maze guide handles the route behind Eleanor’s chained entrance.
Do I need the Ferryman’s Obol first?
No. The travel service is introduced during the Catacombs story route. The Obol hand-in is a separate reward branch for The Whisperer / Freezing Path; it should not be confused with the initial travel unlock.
Plan the last part of your return journey
For a missed Main Hall passage, travel to the region and compare the named-room secret checks. For the four regional mirror challenges, use Sage’s Seals locations. For an unfinished main objective, return to the progression route instead of treating the travel menu as a quest log.
Saved in this browser. These checks do not read your game save.
Sources & verification
- IGN: How to Fast Travel ↗ — primary footage and narration for the unlock, early destination menu, crouch input and regional floors
- Shark R: Catacombs playthrough ↗ — independent chapters for Ferryman unlock at 33:59 and mirror transport at 36:55
- Radio Times: fast travel ↗ — cross-check of the right-hand blue door and crouching interaction
- Polygon: Boatman unlock ↗ — independent Catacombs and first-Death route
- Gamer Guides: The Whisperer branch ↗ — distinguishes the optional Obol reward from the initial travel unlock
Checked 19 October 2026 against the credited gameplay and reference guides. Screenshots are credited video captures, not our own playthrough. Default button labels may differ if controls are remapped.